Blog Entry 3 ( Week 5 + Practical 2 )
- Eshvin Kaur
- Jun 6, 2022
- 5 min read

Updated: Jun 7, 2022
Hi guys, it's me Eshvin, back again with another week of ICPD. I will be talking through my experience for Manual and CADD Drawing using AutoDesk Fusion 360 and my journey in doing up a product using cardboard joinery in Practical 2🤠.
Week 5 Lesson
Manual Drawings✏️
Sketching or drawing is a key technique for creative expression in product design. It is considered the principal approach through which product designers externalise a product’s design concepts. Most importantly, sketches or drawings enhance understanding and provide visual clues for possible further refinements and revisions of the product. Here are 6. different type of drawings that we learn.
Warm - Up 1: Sketching Straight Line |  |
Task 2: Sketching Curves |  |
Warm - Up 3; Sketching Circles |  |
Warm - Up 3; Sketching Ellipses |  |
1- Point Perspective |  |
2- Point Perspective |  |
1-point perspective drawing means that;
drawing has a single vanishing point
usually directly opposite the viewer's eye and usually on the horizon line
all lines parallel with the viewer's line of sight recede to the horizon towards this vanishing point
2-point perspective drawing means that;
defined by 2 vanishing points that represent 2 convergence points and infinite distance away.
all geometric objects that are arranged perpendicular or parallel to each other will have drawn sides that converge on each vanishing point.
Manual Perspective Drawing Of The Coffee Maker☕️
In Practical One I dismantle a coffee maker to understand how it works and i drew a schematic diagram.
Now that I have learnt about 1-Point and 2-Point perspective drawings i am able to redraw the schematic diagrams using these newly acquired drawing skills as show below:
Schematic Diagram

1- Point perspective Drawing

CA1 Chemical Product Sketch
Applying what we learn regarding manual drawings , my group decided to sketch our product using
1-point perspective.
front view of the container and cover

side view

Computer-Aided Design (CAD) Drawing
Benefits
•High quality designs (high accuracy, less error)
•Increase productivity (easy to edit/change)
•Easier to read/communications
•Sharing
•Documenting design
I practiced using the Auto Desk Fusion 360 by creating a personalised Key-ring tag as shown below.

CA1 Photo frame Design
We were then needed to design and draw the various parts that can be put together to form a photo frame for a 4R photograph.
This is what my team and I did;
Base (Asraf):
Length: 142mm
Height: 92mm
Offset: 20mm
d1 extrude: 5mm
d2 and d3 extrude: 10mm
d4 extrude: 20mm

Acrylic sheet (Insyirah):
Length: 182mm
Height: 132mm
Extrude: 3.5mm
Appearance: glass light colour(blue)

Cover (Brian):
Length: 142mm
Height: 92mm
d1 extrude: -20mm
d2 and d3 extrude: -10mm
d4 extrude: -5mm

Outer layer cover (Eshvin):
Length: 142mm
Height: 92mm
Offset: 30mm
Extrude: 40mm
Appearance: Tough 2000(with Formlabs SLA 3D Printers)

Logo (Valerie):

Final Design:

Personally it was hard for me to use the Autodesk fusion 360 as i have never used it before and there were too many functions that i had to use😰. However what i did was after i did the keyring for the first time, i tried to do it again the second , third and then the fourth time. I then could create the key-ring tag without looking at the manual and i could understand the purpose of the different functions. When i had to make the outer layer cover for the photo frame, i did not have to look at the manual and i could already figure out how to make. I feel that i have got the hang of it already💪🏻.
Cardboard Joinery (Practical 2)
We had our second practical in week 5 where we worked on cardboard joinery. In this practical we learned about the corrugated fibreboard and how to create a cardboard model using 6 different cardboard joineries.
Literature Research on Corrugated Fibreboard
For pre preparation experiment, we did our research on what exactly is corrugate fibreboard.

We discovered that,
it is the strongest type of paper and the easiest to print on
it has a high strength to weight ratio
it is easy to cut, bend, fold, and drill
6 different cardboard joinery

The six different type of joinery are;
flange
L-brace
tabs
slot + tab
slot + slot= insert
holes ( brass fasteners, zip ties, wire ,skewer)
Brainstorming

My group wanted to make a prototype of the chemical device that we are working on and we did a sketch for it already as shown on the right.

However, our lecturer, Mr Teng suggested that we could work on something simpler and with much creativity that can be put in then out of nowhere my teammate, asraf, mention about this gun that was used in the suicide squad but i was not sure of it then asraf showed me this picture on the left. I was like wow how are we going to. create such a prototype it looks really complicated 😲. Asraf then spilt the work between the five of us and the result were astonishing. ( Wait till the end to find out 🤗 )
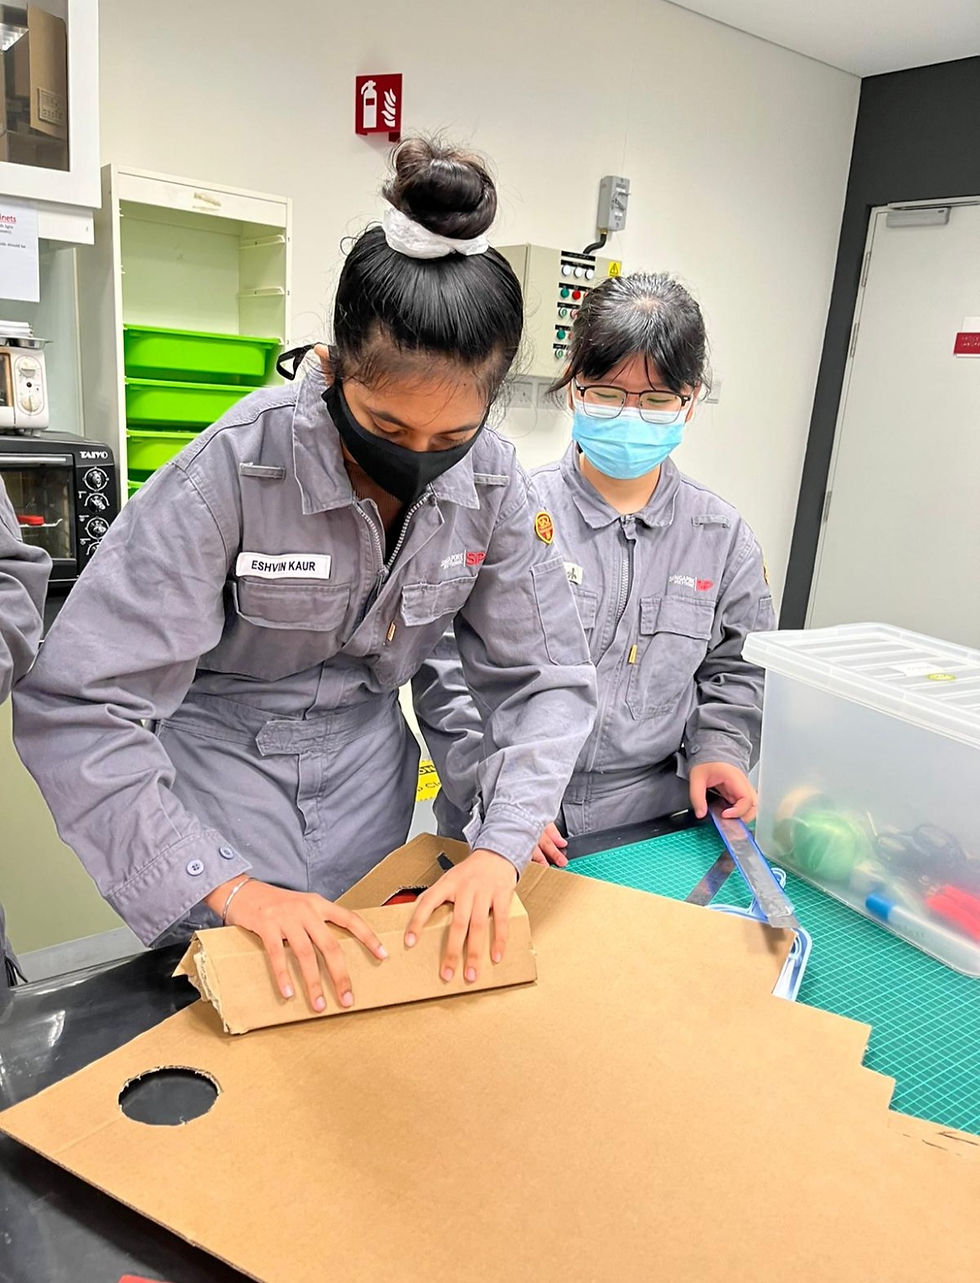
CREATING THE PROTOTYPE!!
( the pictures below shows my teammates applying one of the joinery in making the gun )
Eshvin (me): Brass Fasteners
Brian: slot + slot = insert

Insyirah : Zip Ties

Valerie: Slot + Tab

Asraf: Flange and Skewer

🥳FINALLY THE PRODUCT ITSELF IS DONE!🥳

Presenting you the suicide squad gun a.k.a PUNJABI POWER!!!!!! I know you must be wondering why on earth it is called punjabi power? Well my friends and i have like a thing going on between us where they would just constantly disturb me when i needed to do something and thus they would just say "punjabi power" to motivate me and since my teammate Asraf is also a punjabi we just decide lets name it that but i would say the other reason why we name it that its because it also implies how strong and ruthless our product is. There was not much of a difficulty we faced except that we had to plan everything on the spot and we had to distribute the work among us in such a way that we will be working on different parts of the gun and finally combine them together to form it. There were definitely improvements to be made. Honestly i felt we could have done better if we plan in advance on what we shall do but although we did i feel we can just tell our lecturer about out idea before the lesson so that even if our idea is not right, with the suggestions he give, we could have made the product an even better one. Anyways my team has successfully completed doing up the product and thanks to Asraf who immediately thought of that gun if not we would have spend time trying to figure out what to make.
Yup thats me and my hyper group🤪
Hold up thats not it yet check out what the other groups of my class did ⬇️⬇️,
One of the groups made an airplane🛩 along with the control tower and the other group made a cruise🛳 that i guess its a replica of titanic and they name it "Smalltanic". Honestly theirs were quite impressive else well and i could see the effort that each member actually put in. I am so glad that my whole class enjoy this lesson as we were given the opportunity to put in all the creative ideas we had.

Thats it for my third blog! Really hope that you enjoy reading it😊 I will be back soon for even better content where i will be blogging about my journey in 3D printing and the egg drop challenge👀. Doesn't it already sound excitingggg😏. STAY TUNE AND HAVE A GREAT ONE!!!!!


Comments