Blog Entry 4 ( Practical 5 - 3D Printing & Egg Drop Challenge)
- Eshvin Kaur
- Jul 31, 2022
- 5 min read

YESSS I HAVE HEARD YALL AND ITS FINALLY HERE😆!!!
THE LONG-AWAITED 3D PRINTING AND EGG DROP CHALLENGE BLOG 🎉🎉🎉
In this blog, I will be documenting my experience in 3D printing that led me to make a device that would not break an egg from a drop approximately 2 meters.📝
How did I come out with the design idea?
When my partner, Insyirah, and I was researching different types of designs, my attention was focused on the two designs shown below that I saw.
 |  |
I planned to make something simple and not so complicated as I am not proficient in using Autodesk Fusion 360. With the top right-hand design in mind, I was thinking what if I can store the egg just like that but instead store it in a cube? I knew the egg in the cube will never survive the 2 meters fall so I know I had to add supports. With the top left-hand design in mind, I thought of putting heads with springs around the cube but then I recalled how the design must be entirely 3d printed so I had to drop the spring idea. Then I thought what if I just put the heads/poles around the cube but shaped it in a rectangular form to have more surface area to increase the chances of the support landing on the ground first?

The picture on the right shows the sketch of the object that I want to create.
How the object was designed in Fusion 360?
Step 1:
(i)
Under Create, select "box”.
Then select any plane.
Place the first corner.

(ii)
Press "Tab" to toggle to the other dimension.
Place the second corner and specify the length and width for my design the length and width are 30mm each then press enter.

Step 2:
Drag the blue arrow up to the desired height and for my design, it was 41 mm, and press enter.


Step 3:
(i)
Select the Face of the body to put the hole
Click "Create"-> Click "Hole"

(ii) Adjust the position of the 'hole' to the top right

(iii)
Enter the diameter of the hole which is 3.5mm.
Enter the length of the hole which is 6mm.
Press "Enter"

(iv)
Repeat Step (i)
Adjust the position of the 'hole' to the bottom right
Repeat Step (iii)

Step 5:
(Creating poles)
(i) Click "Create"-> Click "Extrude"

(ii)
To extrude, type "-13mm"
Press "Enter"


Step 6:
(i) (Create holes)
Click "Create"-> Click "Hole"
Adjust the position of the 'hole' to the top left.
Enter the diameter of the hole which is 3.5mm.
Enter the length of the hole which is 6mm.

(ii)
Click "Create"-> Click "Hole"
Adjust the position of the 'hole' to the bottom right.
Enter the diameter of the hole which is 3.5mm.
Enter the length of the hole which is 6mm.
Press "Enter".


Step 7:
(Change Position of the cube)
(i) Press "Move and Copy"

(ii)
Select the body

(iii)
Move it towards the right at "-90 degrees"
Press 'Enter"


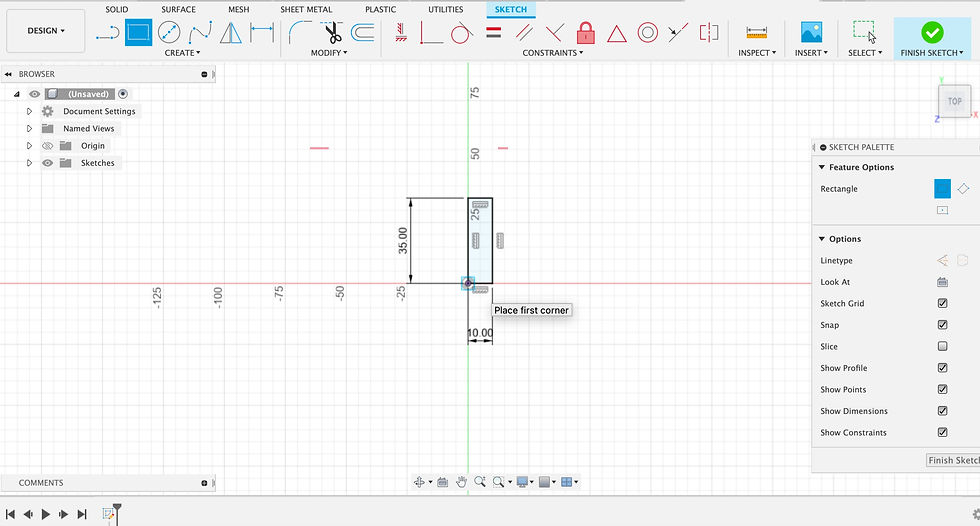
Step 8:
(Sketch the legs out)
(i) Click " Create Sketch"
Enter 35mm for length.
Enter 10mm for width.

(ii)
Press "Enter"
Click " Create Sketch"
Place the first corner below the rectangle and align it to its height.
(iii)
Enter 35mm for length.
Enter 10mm for width.


(iv)
Turn the rectangle below the first rectangle to 45 degrees.
Enter "Finish Sketch".

Step 9:
(Sketch the egg out)
(i)
Click "Create Sketch"
Click "Create"-> "Click"Ellipse"

(ii)
Place Centre Point

(iii)
Type "35mm" for length

(iv)
Place the first axis point
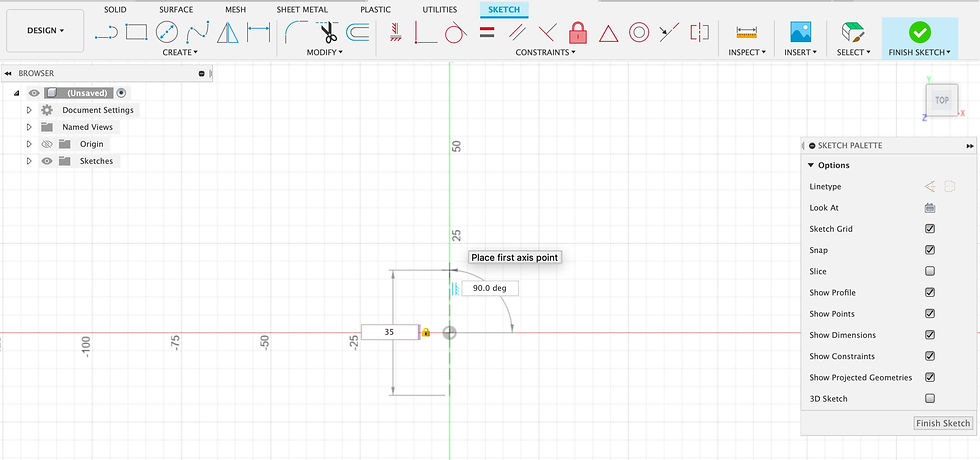
(v)
Type "27mm" for diameter

(vi)
Press "Enter"

(vii)
Click "Finish Sketch"

Step 10:
Copy and Paste the sketch of the egg and legs.
Join the legs to the body.
Create the 'egg hole sketch' in the cube.


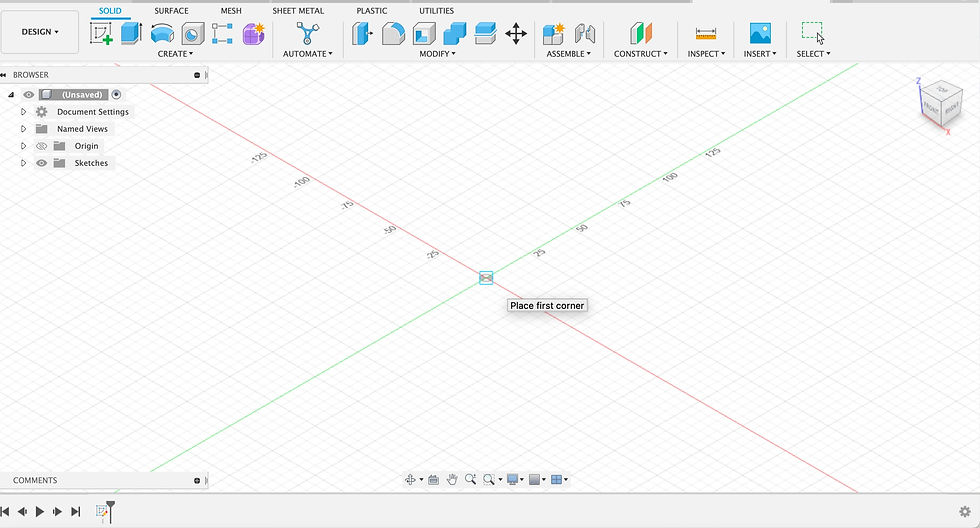
Step 11:
(Create another cube)
(i)
Under Create, select "box”.
Then select any plane.
Place the first corner.
(ii)
Place the second corner and specify the length and width for my design the length and width are 30mm each then press enter.

Step 12:
Drag the blue arrow up to the desired height and for my design, it was 41 mm, and press enter.


Step 13:
(i)
Select the Face of the body to put the hole
Click "Create"-> Click "Hole"

(ii) Adjust the position of the 'hole' to the top right

(iii)
Enter the diameter of the hole which is 3.5mm.
Enter the length of the hole which is 6mm.
Press "Enter"
(iv)
Repeat Step (i)
Adjust the position of the 'hole' to the bottom right
Repeat Step (iii)

Step 14:
(Repeat Step 5)

Step 15;
(Repeat Step 6)
*but adjust the position of the 'hole' to the bottom right and the top left*

Step 16;
(Repeat Step 7)

Step 17;
(Repeat Step 10)


🎉Final Design in AutoCad🎉

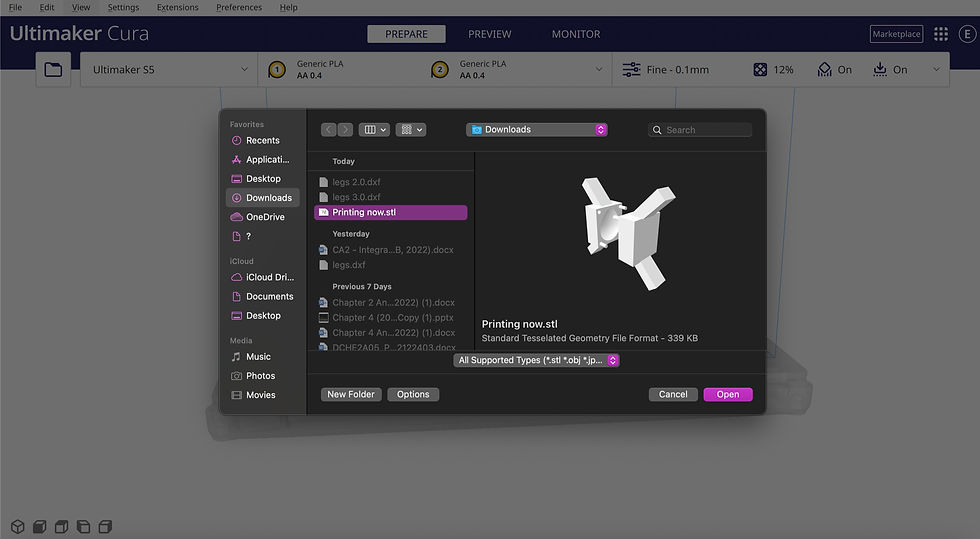
How the object was 3D-printed?
1) Click the "file icon" and click "export"

2) Save the file as 'STL File' and click "export"

3) Launch Ultimaker-Cura App and click the "file" icon at the top left.

4) Click the saved STL File and click "open"

5) Change the infill to 12%.


6) Ensure there is support

7)
Click "Slice"
To see the different layers, click on "Preview" and it should look like this.
The blue area circled in yellow shows that there is support.

Click "Save to Disk"

8)
Save as a "G-code File".

9)
Insert the thumb drive adapter with the SD card into the laptop with the G-code file.
Transfer the file into the thumb drive.
10)
Turn on the main power source and turn on the 3D printer.

11)
Take out the SD card from the adapter and insert it into the 3D printer.
On the control panel, select "Print" --> select the file that has just been saved and press print.

object amid printing.....
Finished Object

Embed Fusion 360 model of the device
3D-printed object
Front View

Inside the cube

Connecting the cube back together

Quail egg in one half of the cube

Quail egg stored in the cube

Video of the Drop👀
*showing of quail egg being raw is included*
Height of the drop : Approximately between 1.8 to 1.9 metres
my takeaway
This 3D printing workflow and journey for this egg drop challenge were not easy for my partner, insyirah, and me. The main problem was that we had no clue how to use AutoCAD. Even though there was an activity in one of the ICPD lessons to create a keychain using AutoCAD, it was not helpful as it did not teach us much so we had to figure it out on our own. To make our lives easier, we decided to not go for a complicating design and look out for a few designs and think about how we can improvise them. The problem we faced during the research was that a lot of the designs included non-3D printable parts and one of the requirements for this design was that the object had to be entirely 3D-printed. We then found 2 different designs that we could work with and took them as inspiration and modified the two designs into an object in terms of shape and dimension and we sketched out a design with a cube that has legs around it. Then we started to figure out how to design it in AutoCAD. The hardest part was creating a sketch for the egg and making the egg hole in the cube and then adding the legs to the cube. With the help of YouTube and some of our friends, we managed to learn how to do that. Finally, we got our desired design. During the printing process, our print failed twice but we managed to adjust some settings during the printing, and it worked and we got our print which took between 2-3 hours. The journey for this egg drop challenge has been successful but a frustrating one. Some of the takeaways from this journey are that now Insyirah and I know how to use AutoCAD much better than before and also we can better understand the physics applied behind this egg drop challenge.
Thats is it for my journey in 3D printing and the egg drop challenge blog✅!
Really hope that you gain some knowledge and skills in using AutoCad and would be motivate to create something of your own🤩!
There will be struggles along the way but the key thing is to never give up💪🏻
I will be back soon for another blog👀
STAY TUNE AND HAVE A GREAT ONE!!!!!


Comments